🎪 How to Set Up a 10×10 Booth at a Craft Show (Without Losing Your Mind!)
Hey there, crafty friend! ✂️
So, you’ve signed up for your first craft fair. Your handmade goodies are ready, your excitement is high, and then it hits you:
“Wait… how do I actually set up my booth?”
Don’t stress — we’ve got you. Whether you’re selling candles, jewelry, crochet, art prints, or homemade pickles, this guide will walk you through how to rock that 10×10 space like a seasoned vendor (even if it’s your first show!).
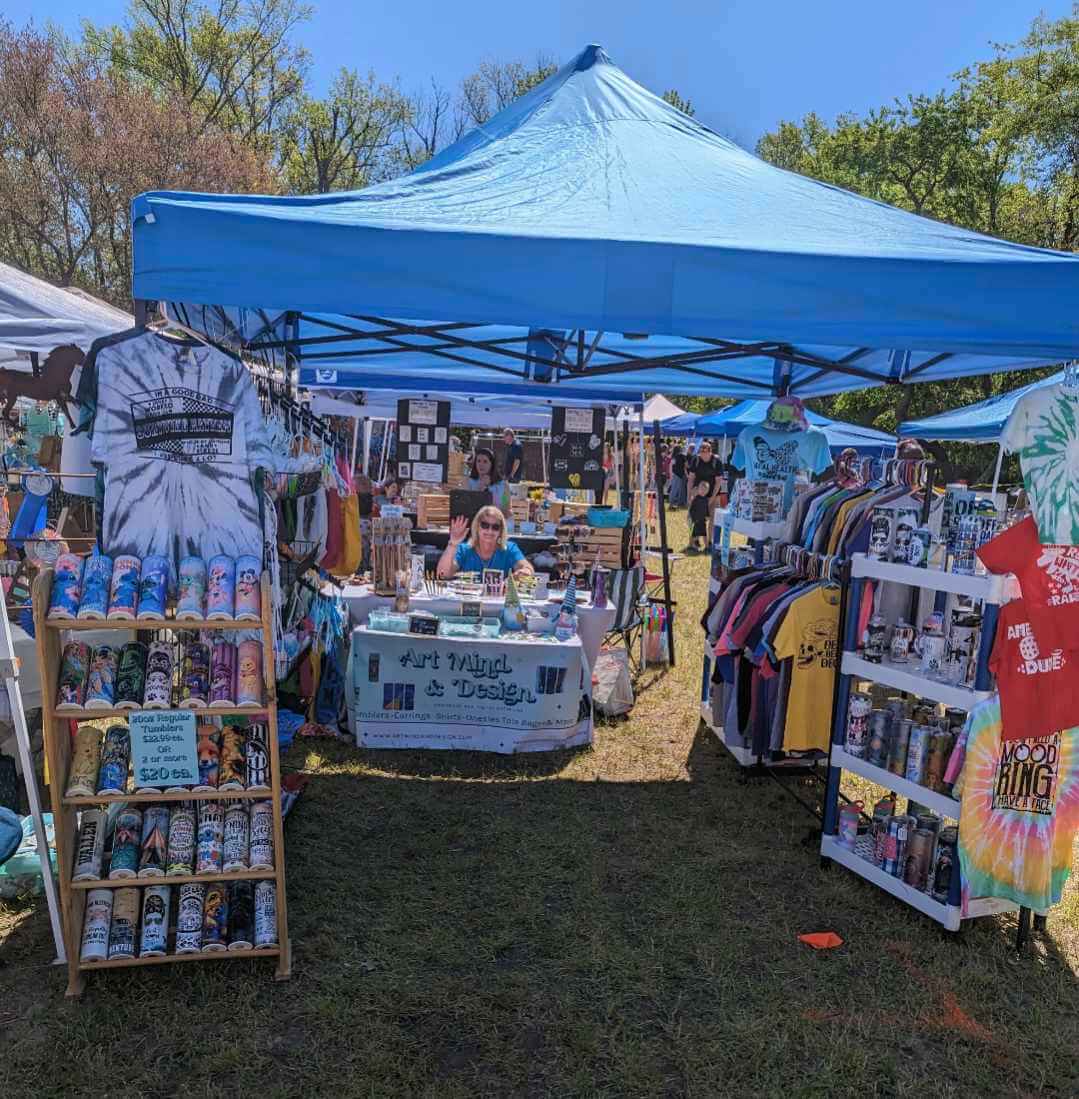
🗺️ Step 1: Know Your Space — It’s 10×10, Not a Mansion
A 10×10 booth is basically the size of a pop-up canopy tent. Think: two yoga mats side by side. It sounds small, but trust us, you can totally make it cute, functional, and profitable.
Here are a few layout ideas:
- U-Shape Layout: Tables or displays form a “U” — great for keeping people in your booth longer.
- L-Shape Layout: Ideal if you’re sharing a booth or want one open side for extra flow.
- Open Concept: One back table with products up front and open walking space. Clean and minimal!
Pro Tip: Tape out a 10×10 square in your driveway or living room to do a mock setup before the big day. It helps so much.
🛍️ Step 2: Display Like a Pro
You don’t need expensive fixtures to look like you know what you’re doing. Use what you have — just be creative!
Display tips:
- Go vertical: Use crates, shelves, pegboards, and risers to show off more without taking up table space.
- Add height: Tall signs or banners in the back can help draw eyes to your booth.
- Tablecloths matter: Use matching or branded ones that go all the way to the ground (great for hiding boxes underneath!).
- Keep it tidy: Organized displays = easier shopping = more sales.
Don’t forget: People love a good vibe. Add a small rug, fairy lights, or even a plant to make it feel cozy.
🧳 Step 3: The Craft Show Packing List You Didn’t Know You Needed
Besides your actual products (obviously!), here’s a checklist to keep your day stress-free:
✅ 10×10 pop-up canopy (with weights!)
✅ Folding table(s) + chairs
✅ Tablecloths and risers
✅ Product displays
✅ Banner or sign with your shop name
✅ Business cards or flyers
✅ Shopping bags or packaging
✅ Payment system (Square, Venmo, etc.)
✅ Cash + change
✅ Price tags/signs
✅ Receipt book (optional but nice)
✅ Portable phone charger
✅ Snacks & water
✅ Hand sanitizer
✅ Duct tape, scissors, zip ties (trust me)
✅ Notebook + pen
✅ Inventory list
🛒 Step 4: Make Buying Easy
If a customer has to ask how to pay, they might just walk away. Let’s fix that:
- Have clear pricing. Every item should be tagged or have signage.
- Accept cards + cash. Use something like Square or PayPal Zettle for card payments.
- Display payment options. Print a little sign that says “We Accept: 💳 💵 Venmo 📱”
- Offer small bags. People love packaging that feels like a treat!
Pro Tip: Use QR codes for Venmo or Instagram — it makes following (or paying!) you super easy.
🎨 Step 5: Brand It Like You Mean It
You don’t need a fancy logo to build a brand. Just be you, but consistent!
- Use the same colors across your table, signage, and packaging.
- Display your shop name clearly.
- Share a little of your story in a cute sign (“Hi, I’m Sam, and I crochet these plushies in my tiny apartment!”)
- Make sure people know how to find you after the show: have business cards or a QR code that links to your Etsy, Instagram, or website.
✨ Final Tips for Craft Show Day
- Arrive early. Give yourself at least 1.5–2 hours to set up — especially your first time!
- Stay standing and smiling. It helps you feel approachable (even if you’re tired).
- Chat with neighbors. Craft shows are a community — don’t be shy!
- Have fun. You’ve worked hard to get here — soak it all in!
You’ve Got This, Maker! 💪
Setting up a 10×10 booth can feel overwhelming at first, but once you’ve done it a couple of times, it becomes second nature. Just focus on creating a space that feels welcoming, shows off your amazing work, and makes it easy for people to buy from you.
Now go rock that craft show — and sell out, baby! 🎉
Written & Edited by Chat GBT & Lacey Lynn